Table of index (click to expand)
- Introduction
- Installation
- Drivers (recommended)
- Drivers (optional)
- Gaming
- Networking
- Printing
- Issues
- Blurry screen/fonts
- Code page
- Fonts
SHARE.EXE not loaded(no longer an issue from 0.82 onward)- MS-DOS Prompt has green background
Introduction
Windows 3.1x is part of a series of 16-bit operating environments produced by Microsoft for use on personal computers, released from April 6 1992 to November 8 1993. Like its predecessors, the Windows 3.1 series ran as a shell on top of MS-DOS, although it does not include the MS-DOS executive shell. Codenamed Janus, Windows 3.1 introduced the TrueType font system as a competitor to Adobe Type Manager. Its multimedia was also expanded, and screensavers were introduced, alongside new software such as Windows Media Player and Sound Recorder. File Manager and Control Panel received tweaks, while Windows 3.1 also saw the introduction of Windows Registry and add-ons. Windows 3.1 remains a 16-bit operating environment, although it can run more RAM. -- [Wikipedia]
The recommended version of Windows to run with DOSBox Staging is Windows for Workgroups 3.11 (WFW3.11 in short). This version includes all applications and drivers required for business or gaming purposes.
Note: DOSBox Staging versions prior to 0.78.0 do not support networking features of Windows for Workgroups 3.11 unless booted into a disk image.
Additionally, DOSBox Staging supports FAT16 images only. Win9x and FAT32 images are out of scope and unsupported respectively.
[Top]
Installation
Installing Windows 3.1 is a quick and easy task nowadays. It was definitely not the case back when the Operating System came out. There are plenty of excellent guides online to proceed with a clean installation (e.g., from DOSBox-X and Dominus'). Therefore we will not reinvent the wheel and assume the reader followed the naming conventions and directories structure described in Get Started.
The most important is to keep Windows in its own folder to not mix things up with your other existing DOS environment. It will be much easier to reinstall the OS should something go wrong (disclaimer: it will).
- Let's create the directory
win31next togames,isos,maps, etc.
- Inside that
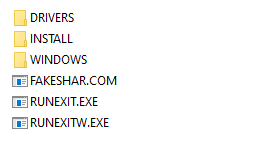
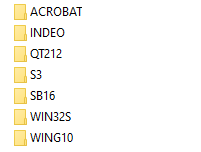
win31folder, let's create two additional directories:INSTALLandDRIVERS. Then extract all files from the Windows 3.1 installation floppies/CD intoINSTALL(it's safe to overwrite any files). Follow the example provided by the Windows 3.0 section if you are unsure. ObviouslyDRIVERSwill contain the display and sound drivers as well as any required applications for running your softwares (eg. Video For Windows, WinG, Win32S, etc).
win31 folder |
DRIVERS folder |
|---|---|
 |
 |
Note: FAKESHARE.COMRUNEXIT.EXE and RUNEXITW.EXE (detailed below in this guide) can also be moved to your U: drive.
- Create a
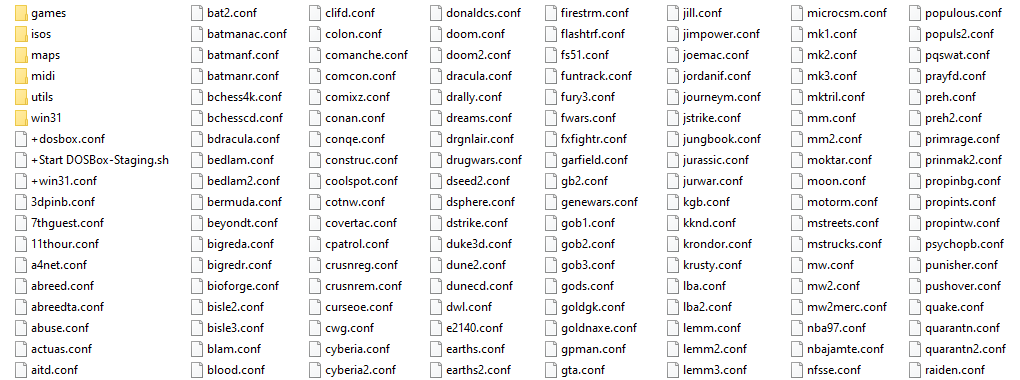
+win31.conffile to your DOS environment, open it with a text editor and copy/paste the following lines:
Click to expand
[cpu]
cycles = max

[autoexec]
mount -u c
mount c /home/user/dosdata/win31
SET PATH=%PATH%;C:\WINDOWS;
C:
The cycles = max parameter is there to ensure a quick installation. Then we check the C: drive has not been mounted already and we mount win31 as C:. Remember that any other parameters will be applied based on your global config file (dosbox-staging.conf).
- Run
+win31.conf:
$ ./home/user/dosbin/dosbox -conf /home/user/dosdata/+win31.conf
- At the
C:\>prompt, type:
C:\>cd install
C:\INSTALL\>setup
Note: on some international versions, you must run install instead of setup.
The default settings are just fine yet make sure the installation directory is C:\WINDOWS, that's the most important part. Once the installation is complete click on Return to DOS and quit DOSBox Staging either by typing EXIT at the prompt or by pressing Ctrl+F9.
- Edit
+win31.confto delete the line withcycles = max. Also let's enable MIDI (assuming a SoundFont has been set in your global config file). Any other parameters from your global config file (dosbox-staging.conf) will be applied.
Click to expand
[midi]
mpu401     = intelligent
mididevice = fluidsynth

[autoexec]
mount -u c
mount c /home/user/dosdata/win31
SET PATH=%PATH%;C:\WINDOWS;
WIN
EXIT
- Run
+win31.confagain to see Windows 3.1 in all its glory.
Pro-tip: you can add : after the WIN command (e.g., WIN :). This will not display the Windows logo on startup, speeding things up a bit.
[Top]
Windows Updates
The following official updates are recommended:
- Q85557: updated File Manager for Windows for Workgroups 3.11, fixes Year 2000 problem
- Q109561 (
WG0974.EXE): corrects occasional problem with keyboard not responding on Windows for Workgroups 3.11 (no longer needed from DOSBox Staging 0.81.0-alpha onward) - Q123087 (
WW1116.EXE): OLE version 2.03 - Q124345 (
WW1138.EXE): bugfixed Calculator for Windows 3.1x
[Top]
Windows Add-ons
A subset of applications and games for Windows 3.1 require one or more of the following add-ons. Programs that require these add-ons, typically bundle them, but those bundled versions are often outdated. As such it is recommended to install them yourself. The latest versions compatible with Windows 3.1 are listed below.
Search for the files online, they are easy to find (also in your preferred locale/language).
- Apple QuickTime 2.1.2: video playback software and codecs.
- Video for Windows 1.1e (
VFW11E.ZIPfile): video playback software and codecs. - Win32s 1.30c (
WIN32S.ZIPfile): allows for running 32-bit applications, includes FreeCell. - WinG API 1.0 (
WING.ZIPfile): API required by many games and some applications.
The following third-party applications may also be needed in certain cases:
- Adobe Acrobat Reader 3.01: to read PDF files (often games include a manual in that format on the disk).
- Windows for Workgroups Accessory Files (
WFWADD.EXEfile): some legacy accessories, includes Reversi. - Adobe Type Manager 3.02 (ATM): Adobe PostScript Type 1 Font manager
- Intel INDEO 4.1 : Audio and video codecs needed by some programs
[Top]
Drivers (recommended)
Display
Windows 3.1 is restricted to addressing a maximum framebuffer size of 4 MB. This means the maximum mode that can be achieved will be 1600x1200 at 16-bit colors. Some old Windows software malfunctions when too much colors are available, it is generally a good idea to stick to at most 64K colors. For gaming it is even safer to stick to 256 colors.
These instructions rely on the S3 Vision 964 driver. It works fine with the S3 Trio64 card emulated by DOSBox Staging and with most Windows software. It also exposes all the graphics modes up to 1600x1200 at 16-bit colors.
First ensure DOSBox Staging is configured for emulating the S3 graphics adapter. Check your global config file (dosbox-staging.conf):
[dosbox]
machine  = svga_s3
vmemsize = 4
Note #1: do not set vmemsize above 4, or else the Windows driver will malfunction. If you have no intention of running Windows at a high resolution it's fine to ignore the vmemsize parameter.
Note #2: same steps can be performed from Windows. Yet it's recommended to proceed as per below. Otherwise there will be trouble especially on a localized version of Windows as explained in the fonts section.
- Download S3 Vision 964 v1.41B5 driver.
- Uncompress and copy all files to your
DRIVERSdirectory underC:\DRIVERS\S3_964for instance. - If you are already under Windows 3.1, close it by pressing
Alt+F4. - At the DOS
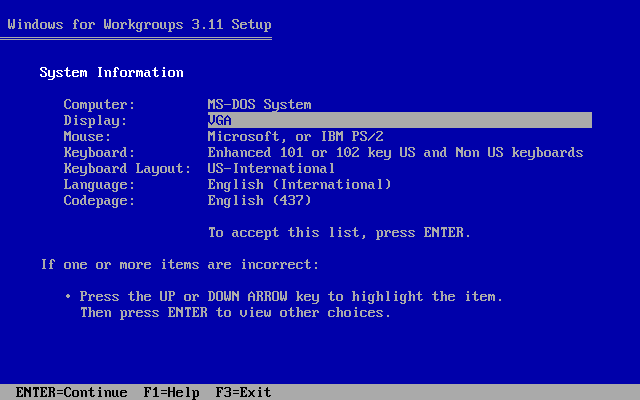
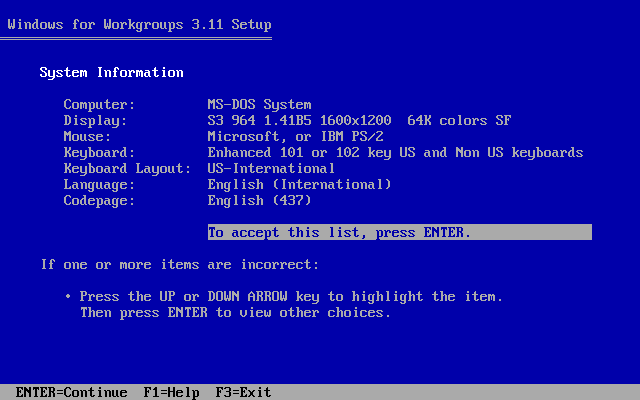
C:\>prompt go toC:\WINDOWSand typeSETUP(orINSTALL) to run the Windows setup program. - Use arrow keys to navigate to
Displaysection and pressENTERto continue:
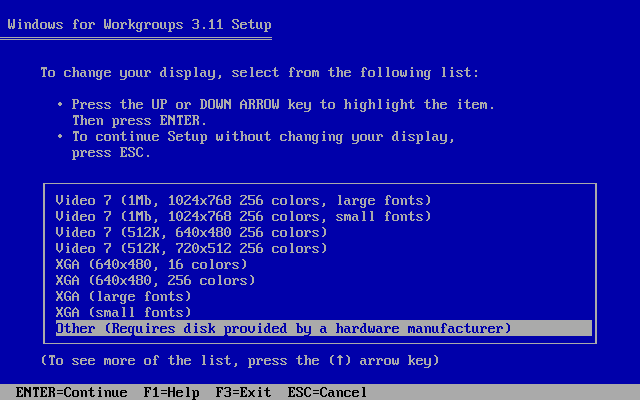
- Scroll to the bottom of the the list with the arrow keys, select
Otherand pressENTER:
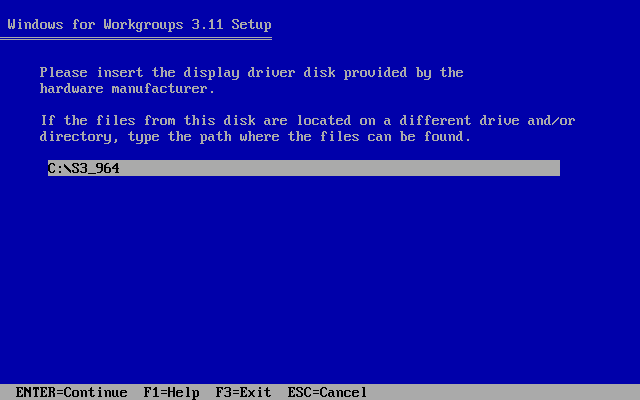
- Type in the directory where you uncompressed the S3 driver and press
ENTERto continue:
- Pick a mode using arrows keys and press
ENTER(640x480 at 256 colors is a safe bet):

- Complete the installation and exit the Windows setup program by pressing
ENTER:
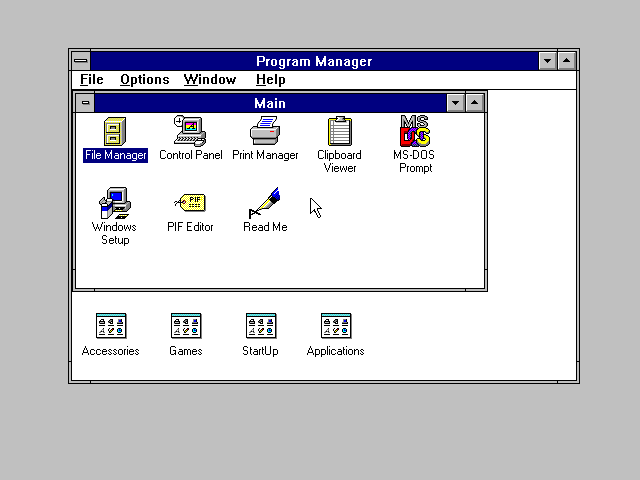
- Run Windows by typing
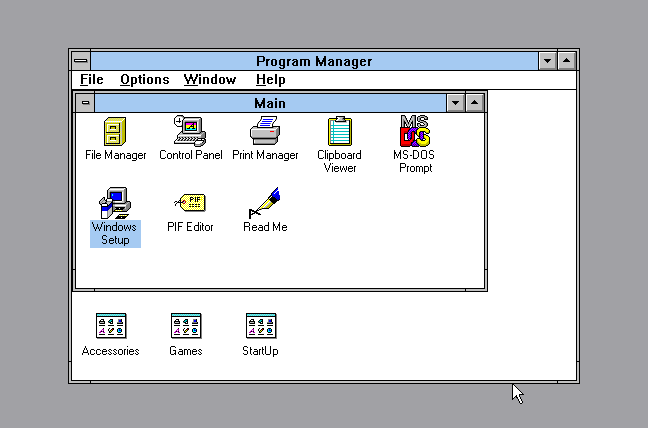
WIN. Notice the title bars are now sky blue:
- Windows 3.1 running at 1600x1200 in 64k colors (SF: Small Fonts, LF: Large Fonts):

[Top]
Sound
First of all, make sure DOSBox Staging is configured for Sound Blaster 16. Check your global config file (dosbox-staging.conf):
[sblaster]
sbtype = sb16
There is an incredible amount of Sound Blaster 16 drivers available. We recommend users to get the following Windows 3.1 Sound Blaster 16 driver (SB16 driver mirror) which is 3MB and comes with the following ID: S16-31STD-1-US (Revision 2). This is the basic and recommended SB16 driver in English.
There is an updated multi-language version which can be installed from Windows 3.1 directly referenced as Sound Blaster 16/32/A64/A64G/A64G2 roughly 350MB in size. Yet go with the recommended version above if you are unsure.
- Create a
SB16folder inside theDRIVERSdirectory and copy all files to it. - If you are already under Windows 3.1, close it by pressing
Alt+F4. - At the DOS
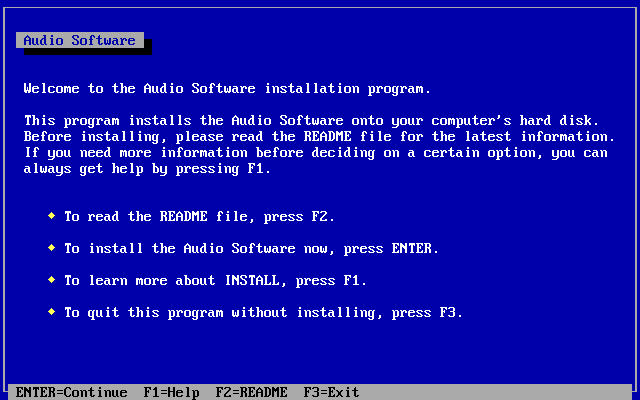
C:\>prompt go toC:\DRIVERS\SB16and typeINSTALLto start the driver setup program. - Press
ENTERto continue:
- This guide shows step-by-step installation in Full Installation mode:

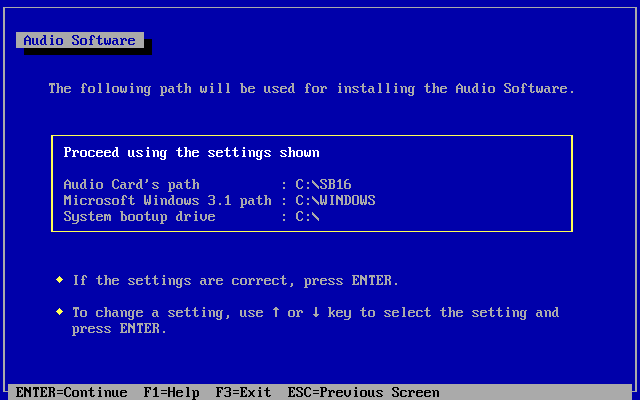
- Press
ENTER(check the Windows directory is correct):
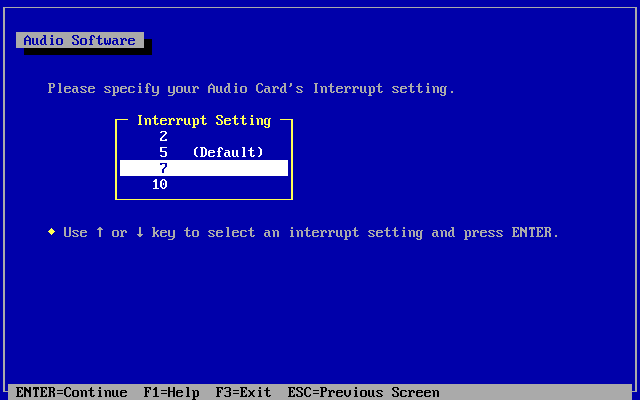
- DOSBox Staging' default setting for Sound Blaster is IRQ 7 (not 5) - select the interrupt setting using arrow keys and press
ENTER:
- Select
7, pressENTER:
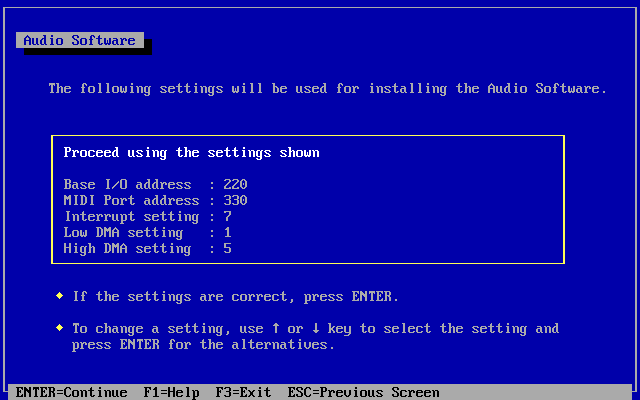
- If everything is correct, press
ENTER:
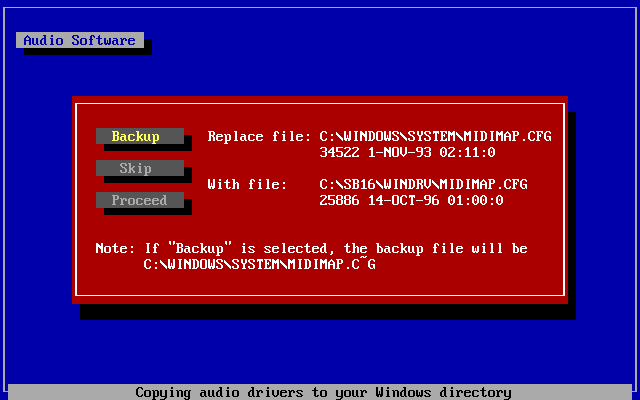
- Installer will copy the files and adjust configuration files. At some point you should be asked about a
MIDIMAP.CFGfile. If you are unsure, selectBackupotherwise go withProceed:
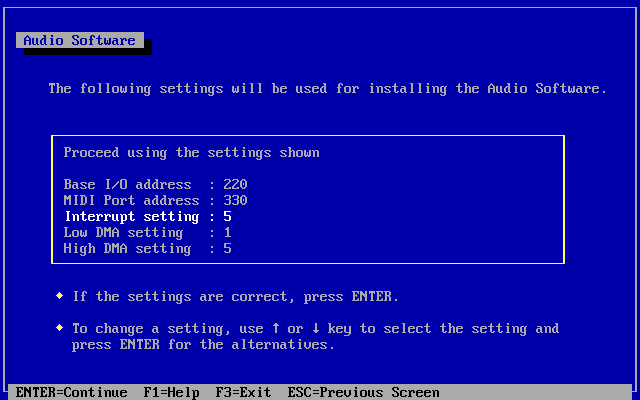
- Press
ENTERat the Summary screen:
- No need to restart DOSBox Staging at this point. Start Windows by typing
WIN. If all goes well you should hear the startup sound:
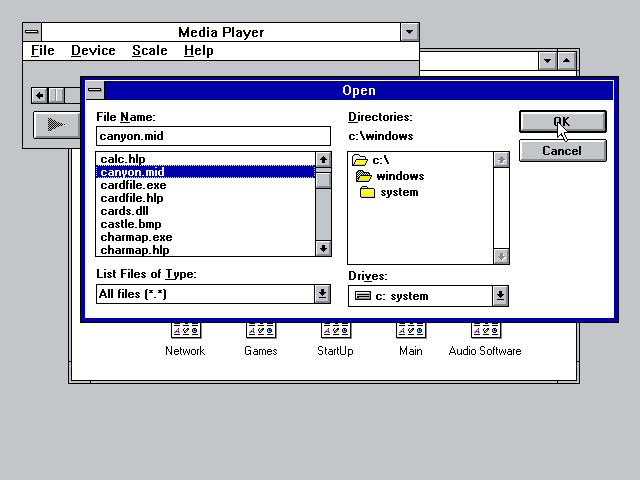
- Test the SB16 MIDI playback with the Media Player application:
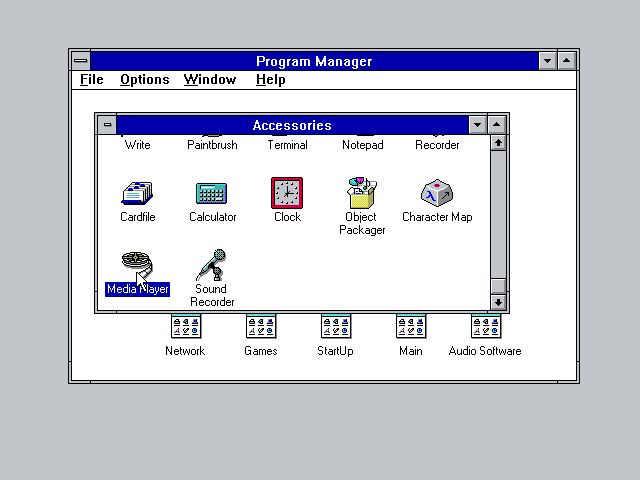
- Try
C:\WINDOWS\CANYON.MID:
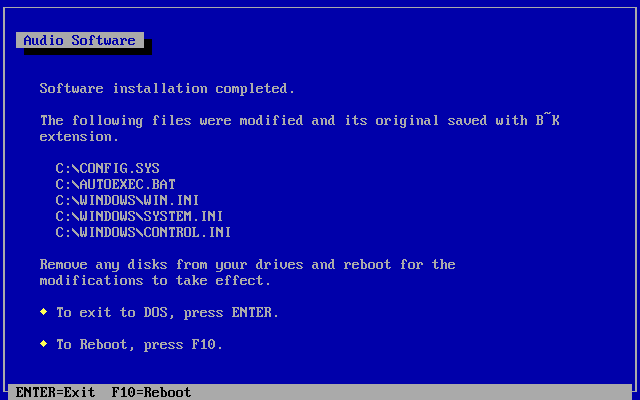
Final notes
The setup creates the CONFIG.SYS and AUTOEXEC.BAT files. They are not needed. Therefore it is safe to remove them (altogether with any other *.B~K files the installer also created). Or you can move them to another backup/storage location to keep the installation clean.
[Top]
Drivers (optional)
Gravis UltraSound
If you prefer Gravis Ultrasound, it is also possible to use it with Windows 3.1. Yet to prevent any detection issues, it is best to disable the Sound Blaster card, at least for the duration of the driver setup.
Make sure DOSBox Staging is not configured for emulating any Sound Blaster card. Check your global config file (dosbox-staging.conf):
[sblaster]
sbtype  = none
oplmode = none
- Enable Gravis UltraSound emulation (disabled by default):
[gus]
gus = true
- Download the Gravis UltraSound driver for Windows 3.1 (4.11).
- Uncompress and copy all the files inside your
DRIVERSdirectory asC:\DRIVERS\GUSfor instance. - If you are already under Windows 3.1, close it by pressing
Alt+F4. - At the DOS
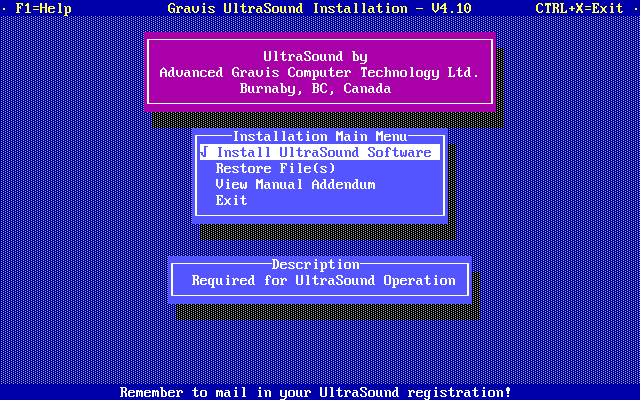
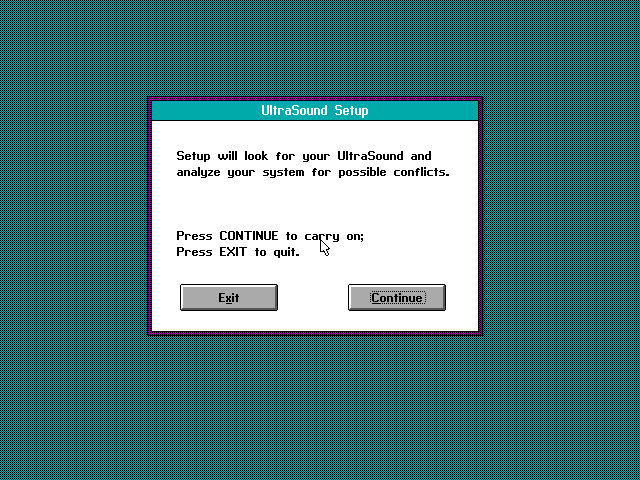
C:\>prompt go to the driver directory and typeINSTALLto run the driver setup program. - Press
ENTERto continue:
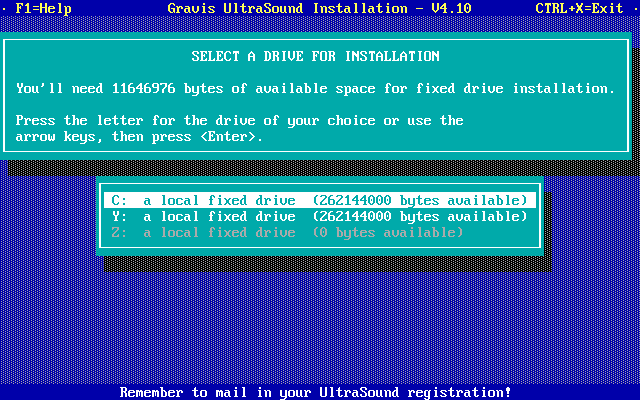
- Select drive (should match
ultradirvalue from the[gus]section), pressENTERto continue:
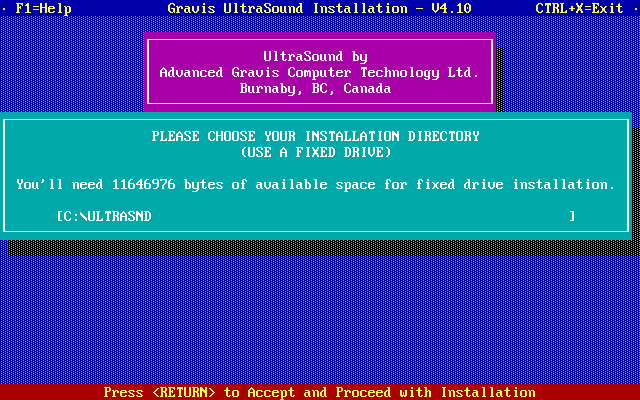
- Make sure the directory is the same as
ultradir, pressENTER:
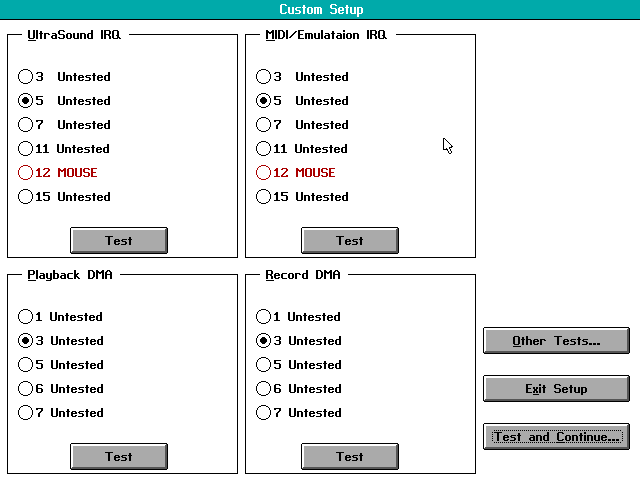
Select Custom Setup, press ENTER:
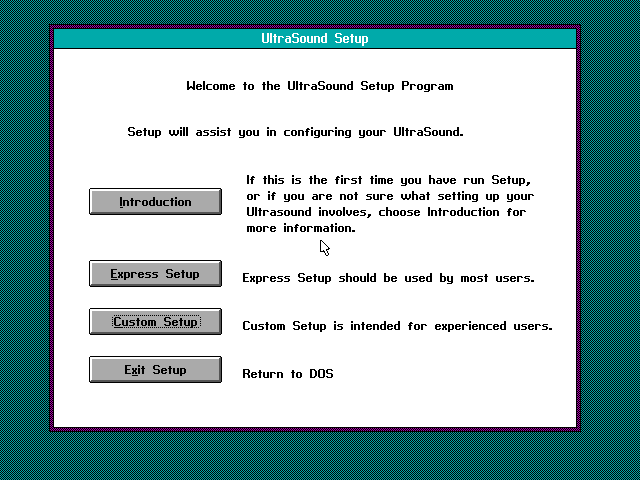
- Press
ENTERto continue:
- Change
gusirq(default 5) andgusdma(default 3) according to the values of your global config file (dosbox-staging.conf). Then pressTest and Continue:
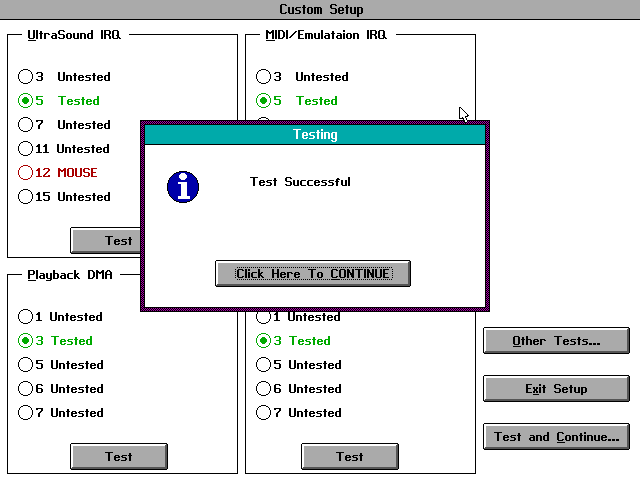
- Installer performs a test. It should succeed. Press
ENTER:
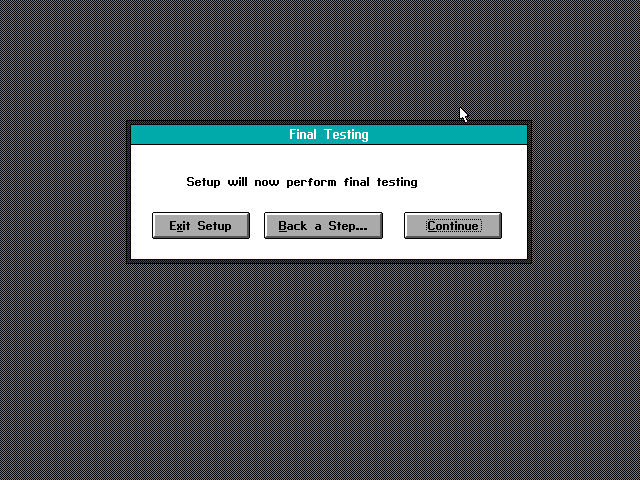
- Press
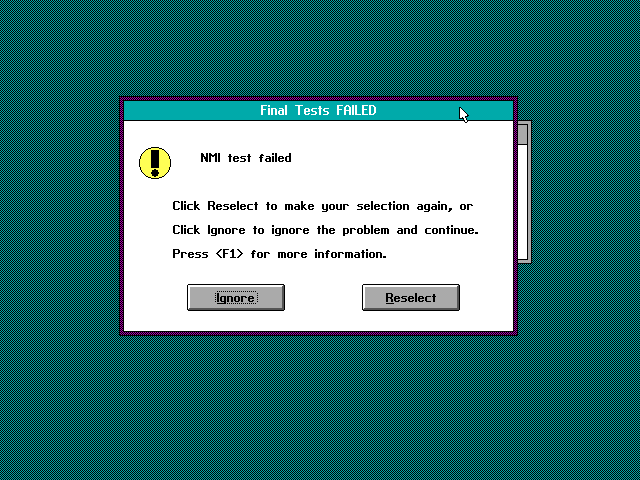
ENTERto proceed with the final test:
- In case of an NMI failure, choose
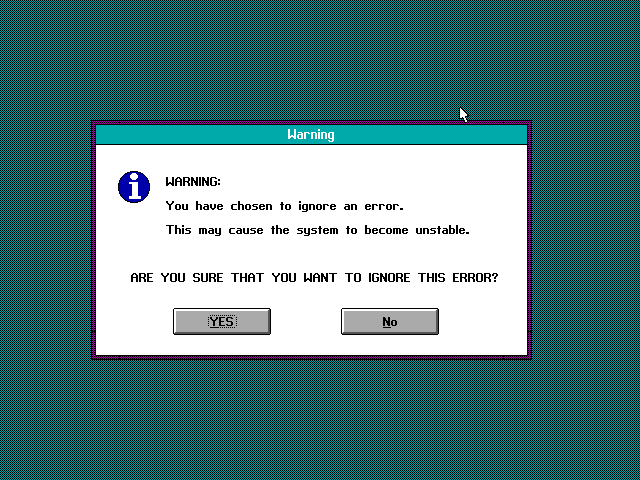
Ignore:
- Confirm you want to ignore the warning:
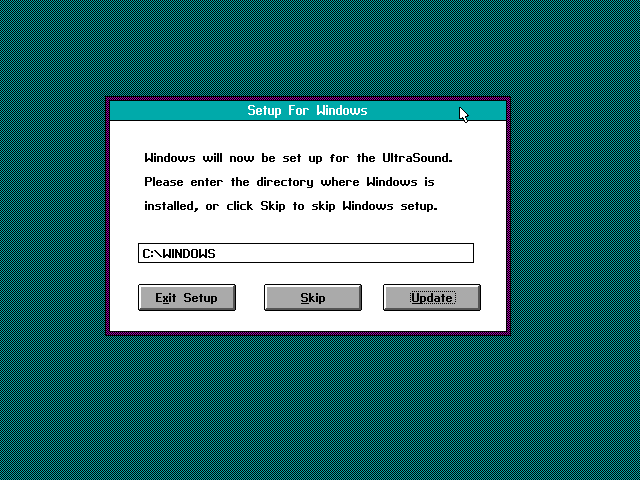
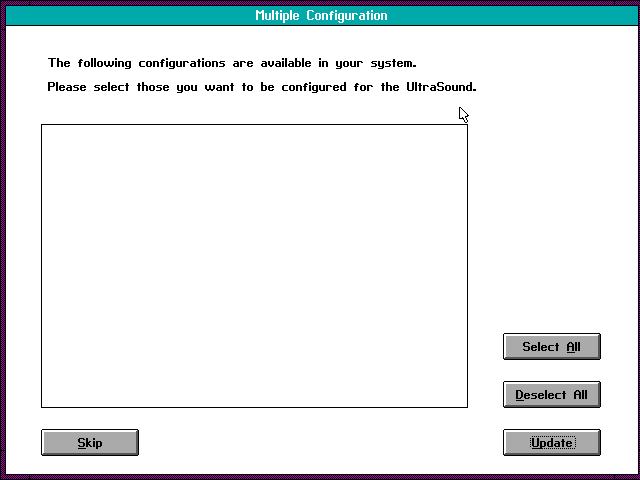
- Adjust Windows directory if needed, select
Update:
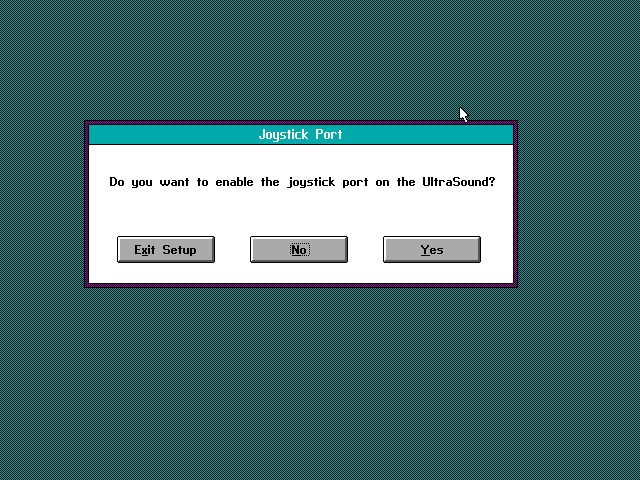
- Select
Noto skip the joystick setup:
- Press
Updateagain:
- Select
Return to DOS:
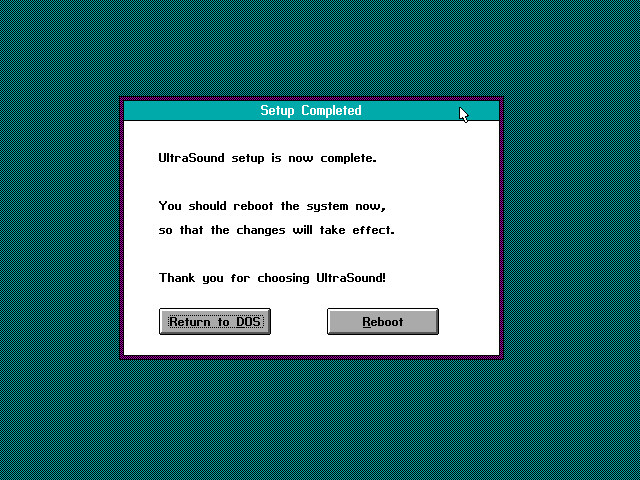
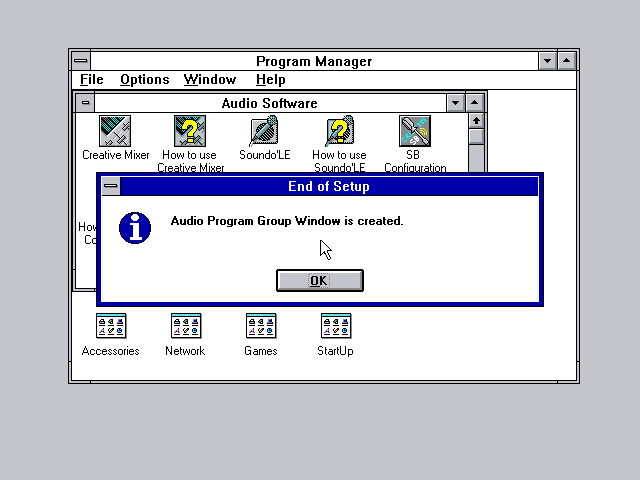
- Next time you run Windows, you should hear a startup sound.
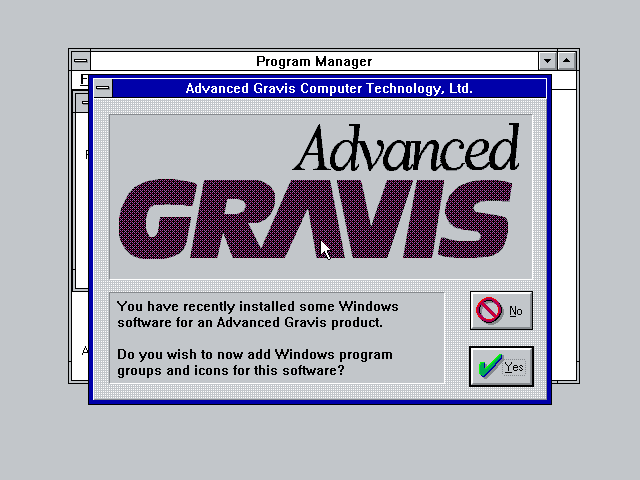
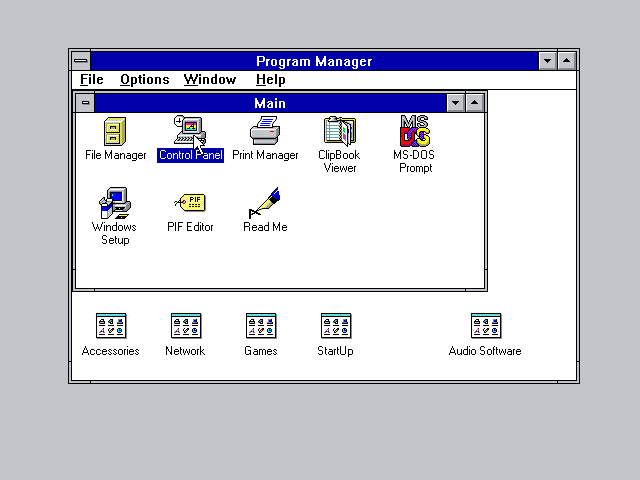
- Confirm creation of the Program Group (select
Yes):
- The Gravis UltraSound Group is now available:
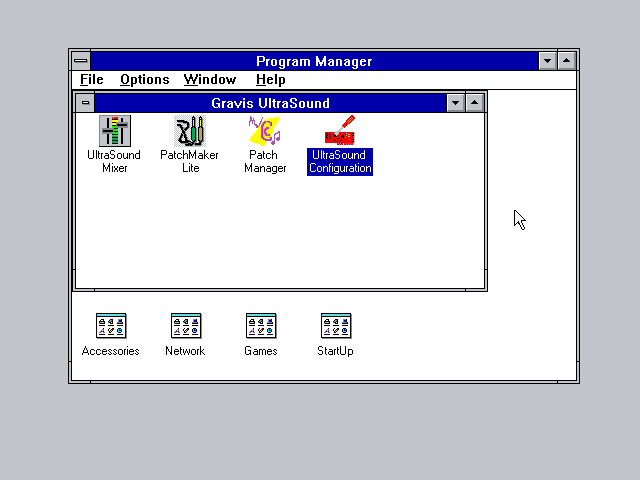
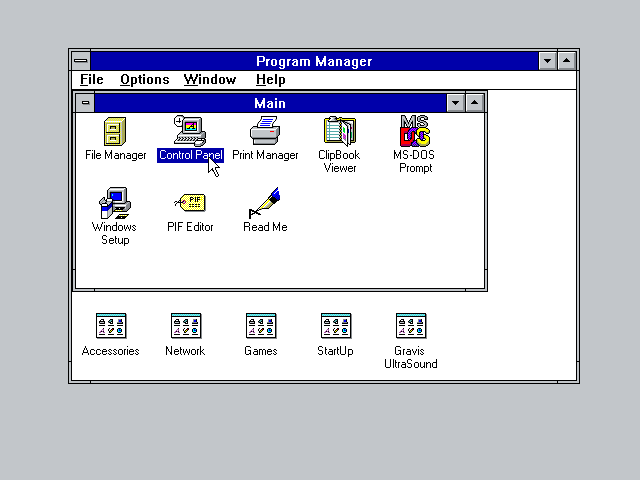
- Go to the
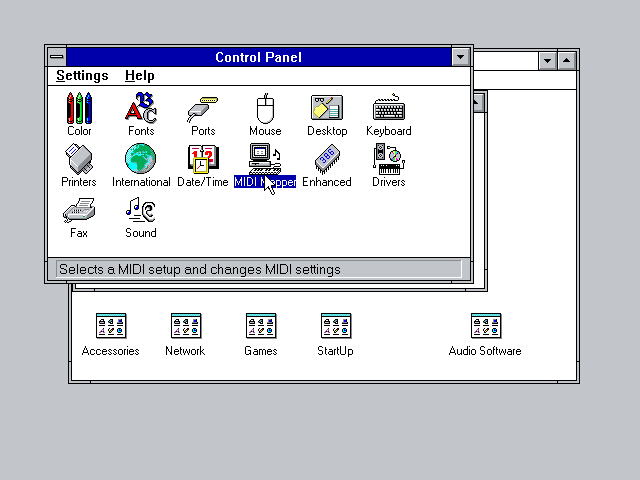
Control Panel:
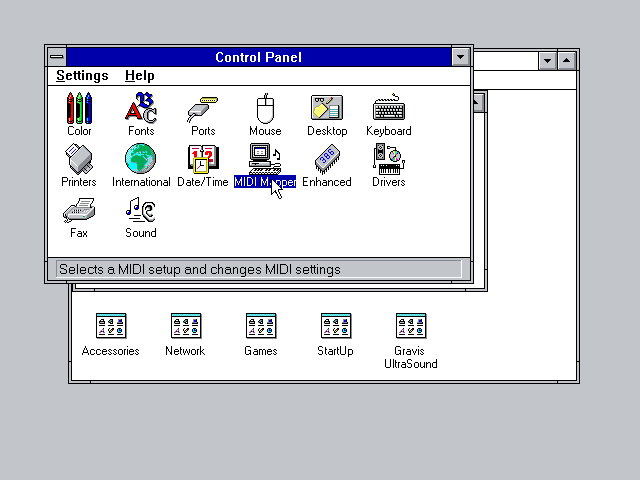
- Double-click
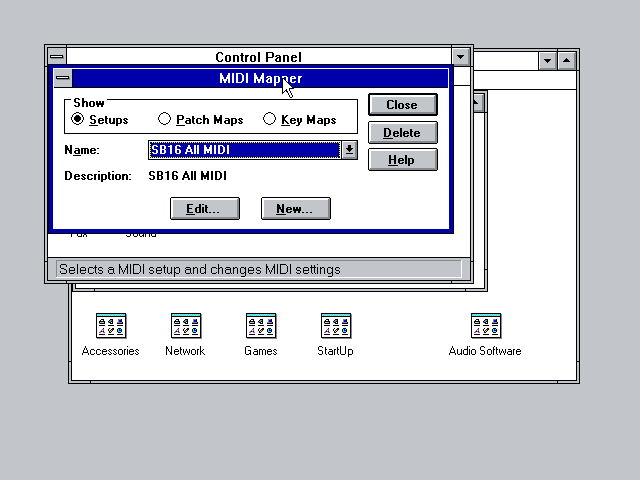
MIDI Mapper:
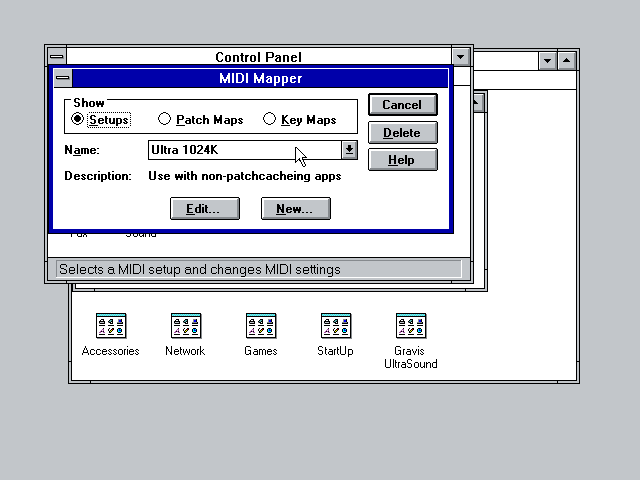
- Select
Ultra 1024K:
- Test your setup by playing
CANYON.MIDfrom your Windows directory via the Media Player:
Final notes
The installer creates a AUTOEXEC.BAT file at the root of C:. It is not necessary and can be safely removed. Yet the @C:\ULTRASND\ULTRINIT.EXE -dj line might be needed by DOS games. If so simply add the line to the [autoexec] section of your configuration file.
If you intend to use Sound Blaster and Gravis UltraSound cards at the same time, you might encounter problems with ULTRINIT.EXE unable to locate the card. If this happens, search for ultrinit226a.zip, and use the older ULTRINIT.EXE from that archive.
[Top]
MIDI
For improved MIDI output, first setup a FluidSynth compatible SoundFont or enable MT-32 (refer to the MIDI section). Both General MIDI and MT-32 are supported. Once done, you have to configure Windows to use it instead of OPL3 MIDI synthesis. To do so, follow these simple steps.
- Open the Control Panel:
- Double-click the MIDI Mapper:
- Select SB16 All MIDI (assuming Sound Blaster 16 has been previously installed):
- Test the setup by playing
C:\WINDOWS\CANYON.MIDwith Media Player.
[Top]
Mouse
For the best results and the best overall compatibility with games, just use the default PS/2 mouse driver Windows sets up by default. This will give you the smoothest movement (the serial mouse options result in a much jerkier movement). It's recommended to prevent host OS level mouse acceleration to be applied on top of the Windows 3.x level acceleration with the below config setting:
[mouse]
mouse_raw_input = on
You might also need to set the mouse speed to lower than the default or to the minimum setting in Main / Control Panel / Mouse.
Alternative mouse drivers are available, allowing for seamless mouse integration in Windows 3.1x:
- VirtualBox mouse driver by @javispedro - seems to be stable, but not much testing was done
- VBADOS package by @javispedro - supports mouse wheel, but the DOSBox Staging is not 100% compatible with this driver yet, in particular the mouse will stop working once the DOS command prompt window is opened; this can be mitigated by using the supplied
VBMOUSE.EXEdriver - VMware mouse driver by @NattyNarwhal - works, but it is not recommended at this moment due to instabilities
It is also possible to use the A4 Tech 3D Mouse driver (iWheelWorks software version 7.0) with either serial wheel mouse emulation or the IntelliMouse Explorer PS/2 mouse emulation. The driver currently allows to use the wheel and up to 3 buttons, but - again - not much testing was done yet. The 4D Mouse drivers do not work at this moment.
[Top]
Gaming
Even if there are not that many games for Windows 3.1 compared to the gigantic MS-DOS library, some still deserve a look though like Bad Mojo, Bermuda Syndrome, Daedalus Encounter or Indiana Jones Desktop Adventures to name a few. Configuring games to run on Windows 3.1 is no difficult task. It just requires patience and some extra software.
This section assumes you have installed the S3 and SB16 recommended drivers as well as all extensions as described in the sections above.
Most games will run only with a display of 640x480 at 256 colors. Therefore let's stick to those values unless a game states otherwise.
Note: before going any further, it is recommended to backup your current Windows directory so that you will not have to go through the same installation process over again should something go wrong.
CD Audio
A few games come with a CD Audio soundtrack (eg. Donald in Cold Shadow). You have to install a specific driver included with Windows to listen to Redbook audio.
- Launch
Control Panel - Open
Drivers - Click
Add, and select[MCI] CD Audio - Type the path to your Windows 3.1 installation disks (e.g.,
C:\INSTALL) - You get a confirmation notice:
Redbook CD Audio Configuration
One CDROM drive was detected. Installation is complete
[Top]
Config file
There is a way to launch a game straight on Windows start and exit to DOS as soon as that game quits. This is especially convenient if you do rely on a front-end to run your games. The following <mygame.conf> config file should cover most cases. As usual any other parameters will be sourced from your global config file (dosbox-staging.conf).
[cpu]
cputype = pentium
cycles  = 30000

[mouse]
mouse_raw_input = on

[midi]
mpu401     = intelligent
mididevice = fluidsynth

[autoexec]
mount -u c
mount c /home/user/dosdata/win31
mount d /home/user/dosdata/games -freesize 1024
imgmount e /home/user/dosdata/isos/game/<mygame>.cue -t cdrom
SET PATH=%PATH%;C:\WINDOWS;
WIN : C:\RUNEXIT.EXE D:\PATH\TO\GAME.EXE
EXIT
All you need is to run this config file. Windows should start and all your various drives mounted as requested. Proceed with installing your game by heading to the File Manager then click on your CD drive (E: in our example) and double-click on the installation program typically setup.exe. Once installation completed, close Windows. Edit your <mygame.conf> file to point to the game's executable. Next time you run <mygame.conf> Windows will start and launch the game immediately without any input from you.
Config file explained
cputype = pentium will ensure most games do launch. Without this parameter some games will throw a typical error: 21 or will not run at all.
cycles = 35000 sets the approximate speed of a slow Pentium. Windows 3.x works best on fast 486 or slower Pentium CPUs, so 25000 to 50000 cycles is the recommended period-accurate range.
mouse_raw_input = on ensures that host OS level mouse acceleration is not applied on top of the Windows 3.x level mouse acceleration.
The two lines under [midi] ensures General MIDI is enabled and it is assumed you set a SoundFont in your global conf file (check the MIDI section). If you don't plan to rely on MIDI at all, you can safely remove those lines.
The [autoexec] section will unmount any previously mounted C: drive (if any). Then mount your separate Windows directory as C: drive. Your games directory will be mounted as D: and any CD-ROM as the E: drive.
Then we have to add specific paths so that Windows knows where to look for some executables or system files. The last line is the most important as it basically tells Windows to run C:\RUNEXIT.EXE which will in turn launch your game's executable.
One can also notice the : after the WIN command. This will prevent the Windows logo to show on startup, speeding things up a bit.
[Top]
RUNEXIT.EXE
Steven Henk Don created an excellent tool for Windows 3.x called RUNEXIT.EXE. This utility is intended to run a single application and immediately closes down Windows after that application quits. It even accepts parameters. Therefore the following line starts Windows, which in turn starts RUNEXIT.EXE, which then runs GAME.EXE in the directory D:\PATH\TO. After the game exits, RUNEXIT.EXE shuts down Windows, returning to the DOS Prompt.
WIN : C:\RUNEXIT.EXE D:\PATH\TO\GAME.EXE
Note: even if RUNEXIT.EXE will work most of the time, a few games will not close Windows on quit. There is a fork allowing such games to close Windows on exit called RUNEXITW.EXE.
It is recommended to download the binary and save it next to your Windows directory or to your U: drive.
[Top]
Gaming issues
Game doesn't install (no longer an issue from 0.82 onward)
While running installation process for the first time, some games will complain that SHARE.EXE is not loaded. There is a known workaround detailed in the SHARE.EXE not loaded section below that may or may not work.
Game doesn't run/error 21
Make sure to set cputype = pentium in your config file. Indeed without this parameter some games will throw a typical error: 21 or simply nothing happens when you double-click the game's executable. [Reference]
No sound
You get an error window claiming WaveOut failed or something about no digital driver available despite having properly configured your soundcard:

Workaround: disable any Windows Startup sound.
- Launch
Control Panel - Double-click
Sound - Find
Windows Startupfrom the list on the left - Click on it once and select
<none>on the right - Close with
OK
[Top]
Networking
Native IP networking setup
Here is a basic guide for setting up native IP networking in Windows for Workgroups 3.11. For you this basic guide will be easier as Windows for Workgroups 3.11 ships with drivers for NE2000 compatible network cards. The correct network card driver to use is NE2000 Compatible [NDIS2/NDIS3].
With Windows for Workgroups 3.11 you can use 32-bit networking so it supports IP networking with Microsoft provided stack codenamed Wolverine that can be downloaded from WinWorld.
You need to initialize and start your Windows networking subsystem first. It's not done automatically with DOSBox Staging but there is a workaround for this.
- First you need
DEVICE.COMthat is pulled from late DR-DOS (.ZIP). - Make a directory for example
C:\CMDTOOLSand extractDEVICE.COMthere. - Create a
.BATfile (eg.NETSTART.BAT) inC:\CMDTOOLSand copy-paste the following lines:
@ECHO OFF
ECHO Starting Windows networking subsystem...
DEVICE C:\WINDOWS\IFSHLP.SYS
C:\WINDOWS\NET START
Simply run NETSTART.BAT to start the Windows networking subsystem and after that run Windows. Starting Windows networking subsystem automatically with [autoexec] or AUTOEXEC.BAT may cause problems with games like Crusader: No Remorse for instance.
[Top]
Printing
DOSBox Staging has no support for emulating a printer, or even for emulating a parallel printer port. As such you cannot print directly from Windows 3.1 to a real printer.
But here is a workaround. Let's use the ability of Windows 3.1 to print to a file, which can then be opened on the host with an application that can handle PostScript files, for printing or saving as PDF.
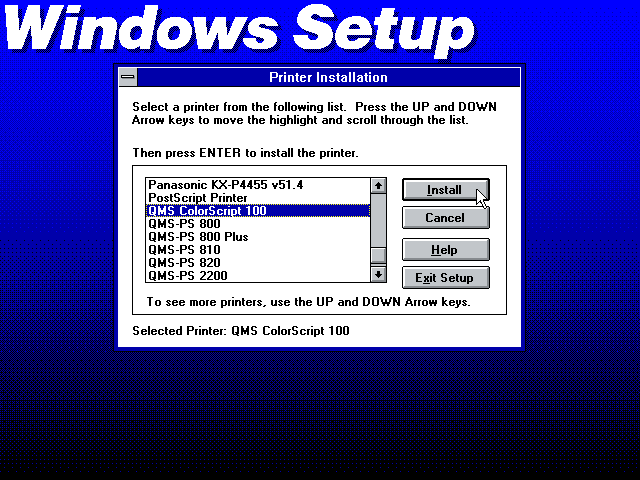
Note: This guide uses the QMS ColorScript 100, which is a 300dpi colour PostScript Level 2 printer supporting typical A4 and US Letter output formats. Other PostScript printer driver options should also work but have not been tested.
Printer Installation
During Windows installation
- During Windows
SETUP, when asked to setup a printer, you can select theQMS ColorScript 100and clickInstall.
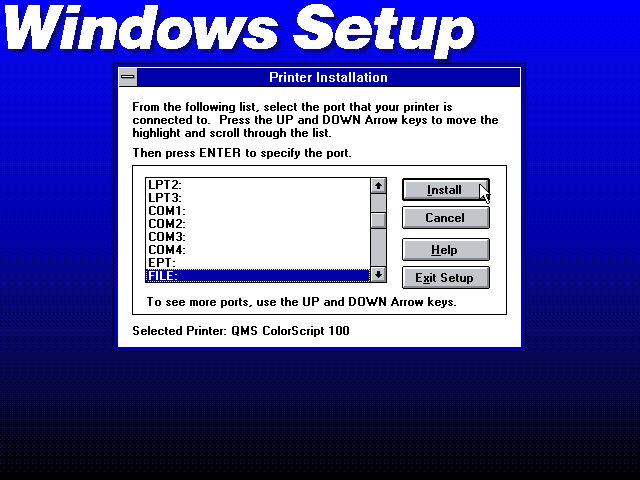
- When asked about the port, select the
FILE:option, and clickInstall.
Note: Windows may default to US Letter paper size, a different default paper size can be set after installation.
After Windows installation
Alternatively a printer can be configured after Windows is installed by launching Control Panel.
- Double-click
Printersicon. In the list of printers, select theQMS ColorScript 100and click theInstall...button.
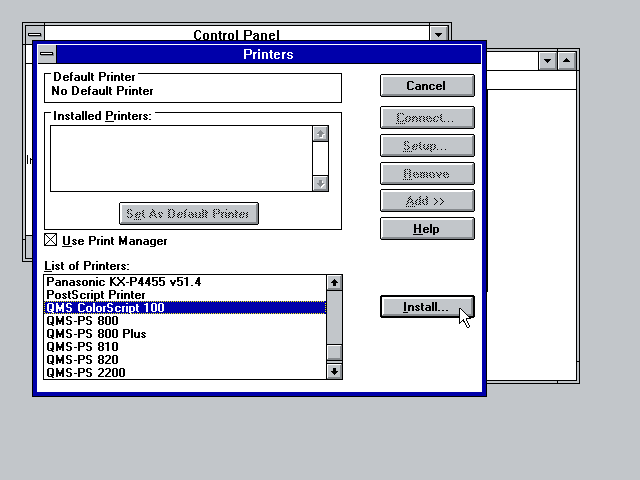
-
If prompted for a Windows setup disk, type in the location where you unpacked the Windows 3.1 installation disks (eg.
C:\INSTALL). -
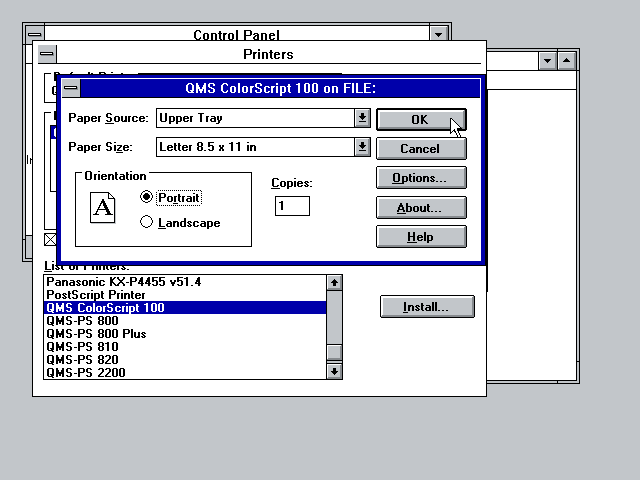
Make sure the newly installed printer is highlighted, and press the
Connect...button. From thePortslist, selectFILE:and pressOK.

- Optionally, press the
Setup...button to change the default paper size.
- Close any dialog boxes by pressing
OKuntil you get back to theControl Panel.
Adobe PostScript 3 printer driver
Adobe provided PostScript 3 support in 1997 with PostScript Printer Driver AdobePS 3.1.2 for Windows 3.1 on their website for download. PostScript is still used as a high-end printing solution on macOS, Windows and more generally on Unix.
This driver is superior to Windows 3.1x generic PostScript Level 2 driver by offering impeccable pathway to PDF via LanguageLevel 3 support and offers a wide selection of features and capabilities when used with Adobe Acrobat 9.0 PPD:

Download: PostScript Printer Driver AdobePS 3.1.2 for Windows 3.1
Download: Adobe Acrobat 9.0 PPD
PostScript Printer Description (PPD) - Wikipedia
Adobe Acrobat 9.0 PPD should also work with any DOS applications that have PostScript driver with PPD support. It will always dial in the maximum LanguageLevel, feature set and capabilities supported by the DOS applications PostScript driver.
Refer to included README.WRI for information and instructions, run SETUP.EXE installer, restart Windows and select Install with the PPD selected in PostScript Printers Control Panel and it will be added as an installed printer to your Printers Control Panel.
Remember to configure printer port as FILE: so print to file is always provided even if the application doesn't support it. Select Help on the print pane to see help on the various options available and select Contents in Adobe Printer Driver 3.1 Help to see the help contents:


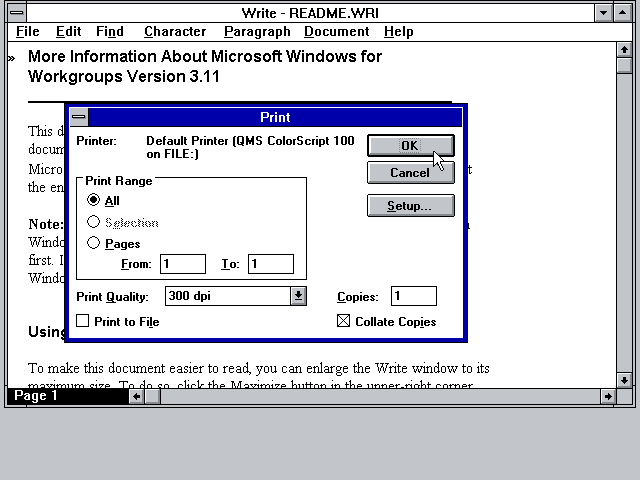
Print from applications
When you print in a Windows application, it will open a Print dialog box where you can change printer. Under Setup... you can optionally change the paper size. Once you are all set, click OK to continue.
A Print To File box will now open asking for an Output File Name:. Enter path and filename (if a path is not specified, the file will be saved in C:\WINDOWS). It is recommended to use the file extension .ps as it will be saved as a PostScript file.
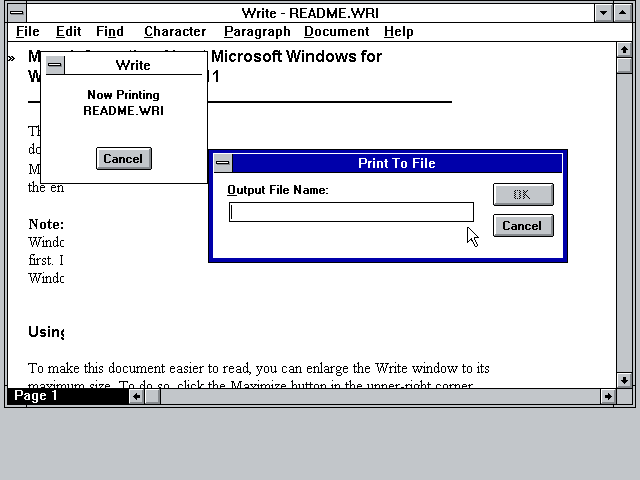
You can now open the file on the host and either print it, or convert it to PDF. This is easy on GNU/Linux given that the necessary tools are typically already installed. On Windows it will be necessary to install something like GSview.
For macOS hosts, starting with macOS Ventura (13) PostScript support was removed from the Preview application. With this edition it is still possible to drag a PostScript file to the printer icon, but this support was also removed in macOS Sonoma (14) for printers without PostScript support. With macOS versions 14 and newer, it is necessary to install ghostscript via Homebrew or MacPorts to get the ps2pdf CLI utility to allow converting a PostScript file to PDF.
Do note that if your printer has PostScript support, then any conversion steps aren't needed, and you can still continue printing raw PostScript to it as before on macOS.
[Top]
Issues
Blurry screen/fonts
Should you end up with a blurry screen or no crisp fonts in Windows, try with output = opengl instead of openglnb in your global config file.
Code page
Sometimes you might want to use DOSBox Staging using a different code page than expected by your version of Windows. It might cause issues with the installer:
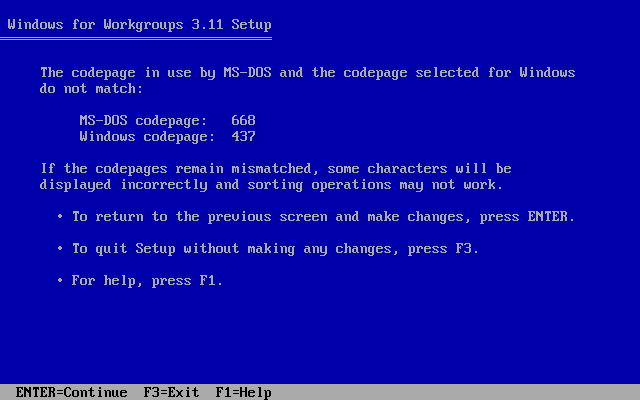
In such case, you can use the KEYB command to set the proper code page before running the installer, for example:
keyb us 437
You can find the list of supported keyboard layout and code pages in the documentation:
Another possible issue (often happens in localized Windows versions, Windows for Central and Eastern Europe, and possibly others) is Windows trying to upgrade DOS to add support for missing code page. Do not allow this to proceed, it won't work correctly with DOSBox Staging built-in DOS.
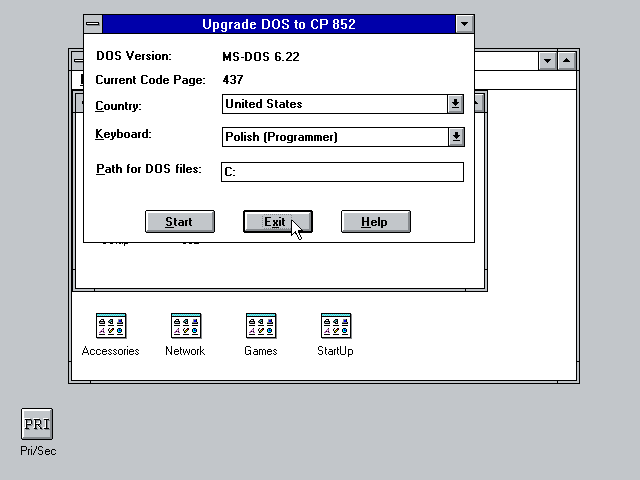
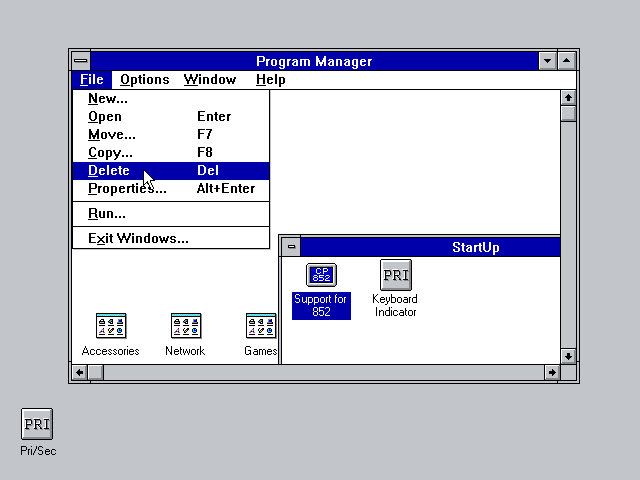
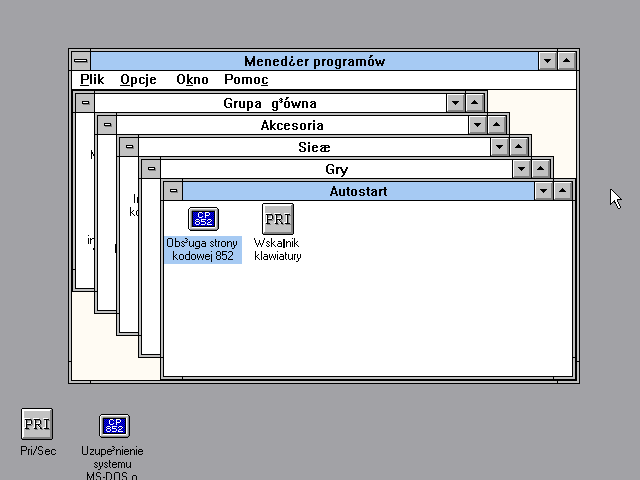
Click the Exit button (or whatever it is called in your localized version), afterwards remove this tool from the StartUp Group (might have different name in localized Windows):
[Top]
Fonts
Display driver installation often overrides the default Windows fonts and startup logo, leading to issues on localized Windows versions:
Workaround: make sure to never install display driver during Windows installation, stick to the default which is VGA. Once Windows has been installed it's best to add the display driver via DOS as explained in this guide. Last backup any *.FON, VGALOGO.LGO and VGALOGO.RLE files from your C:\WINDOWS\SYSTEM directory before attempting to install the driver. Restore those files afterwards.
[Top]
SHARE.EXE not loaded (no longer an issue from 0.82 onward)
Windows programs that rely on SHARE.EXE or the later Windows 3.x driver VSHARE.386 will crash on starting with an error message that SHARE.EXE has not been loaded. This affects mostly office programs, e.g. Microsoft Office, Works, Publisher, Lotus Office, etc. -- [Source#1] [Source#2]

One workaround is to rely on the small utility FAKESHAR.COM which, as the name implies, fakes that SHARE.EXE is running. Yet this could lead to data loss with the affected office programs in Windows. For gaming this should be fine though.
Load FAKESHAR.COM before starting Windows, this way:
[autoexec]
SET PATH=%PATH%;C:\WINDOWS;
C:\FAKESHAR.COM
WIN :
EXIT
For completeness sake, there is another tool known as NOSHARE.COM which achieves the same goal. (no longer an issue from 0.82 onward)
[Top]
MS-DOS Prompt has green background
You must set DOSPRMPT.PIF with the PIF Editor to Video Memory: High Graphics as shown here:
[Top]